How to install LED strips so they don’t fall off?
Installing LED strips may seem like a simple task, but many people encounter a problem when the lighting starts to fall off after a few days or weeks. Well-fixed LEDs are not only a matter of aesthetics, but also of durability and installation safety. To avoid frustration and enjoy long-lasting results, it’s worth learning about proven ways to fix LED strips securely. In this guide, we’ll discuss the most effective methods to help you avoid LED peeling problems.
What will you learn from this article?
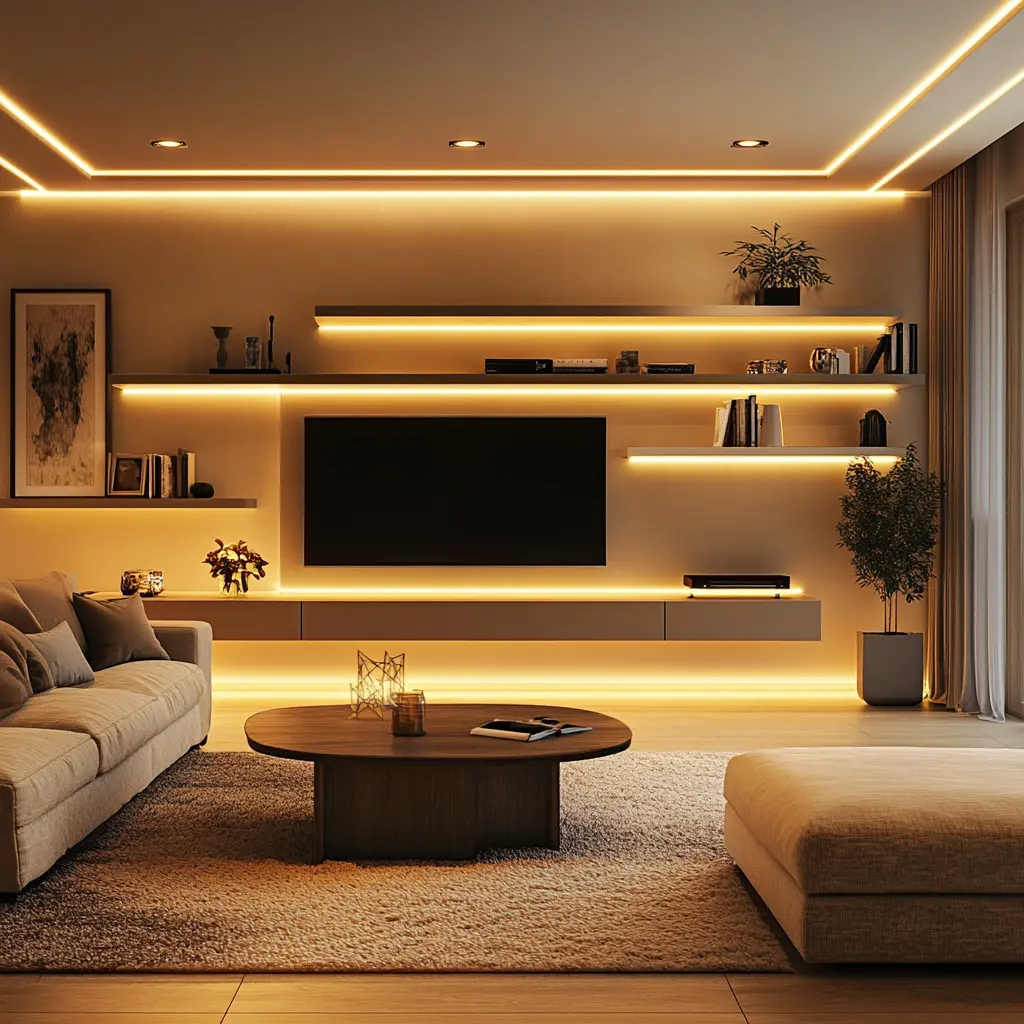
What are the advantages of LED lighting in the interior?
LED lighting and LEDs offer a number of advantages that make them extremely popular. First of all, they are energy efficient, consuming much less energy than traditional incandescent bulbs, which translates into lower electricity bills. They are also characterized by long life – they can last up to tens of thousands of hours, which minimizes the frequency of their replacement.
What’s more, LEDs emit bright and clear light, available in a variety of colors, which gives great freedom in interior design. In addition, they are resistant to mechanical damage and shock, and do not emit large amounts of heat, making them safer to use. These advantages make LED lighting not only practical, but also ecological and economical.
How to install LED tape? An effective way to install LED tape
To place LED tape on the wall in a way that will ensure durability and aesthetic appearance, it is worth following the following few steps:
1. Surface preparation
Before you begin installation, make sure that the surface to which you want to stick the LED tape is clean, dry and smooth. Clean it of dust, grease and other dirt with isopropyl alcohol or other degreaser. This will ensure better adhesion of the tape.
2. Adjust the length of the tape
Cut the LED tape to the correct length. Make sure you cut it only in the designated areas, usually marked on the tape with a scissors symbol. If you plan to connect several sections, prepare the appropriate connectors or solder the wires.
3. Use of additional adhesive
Although LED strips often come with an adhesive layer, it is not always strong enough. To ensure long-lasting adhesion, it is worth using an additional mounting adhesive, preferably one that is designed for plastic and metal surfaces. A popular choice is mounting-type adhesive, which bonds quickly and is heat-resistant.
4. Sticking the LED tape
It’s time to glue the LED tape. Carefully remove the protective film from the strip and apply it to the prepared surface. The strip has double-sided adhesive tape. Try to do this evenly to avoid air bubbles under the tape. Press the LED strip all the way down to ensure maximum adhesion.
5. Power supply and testing
After attaching the LED strip, connect it to a power source and check that all the LEDs light up properly. Make sure the power supply has the right power and is suitable for the length and type of LED strip.
6. Protecting the ends
If the LED tape is installed in a place exposed to moisture, such as in the bathroom or outside, protect the ends of the tape with silicone or special plugs. This will avoid moisture problems and prolong the life of the tape.
By following these steps, you will install the LED tape in a durable and aesthetically pleasing way, enjoying the effect for a long time.
What is the installation of LED profiles with adhesive?
Mounting LED profiles with mounting glue is an effective method that provides a solid fix, especially on surfaces where traditional methods, such as screws, may not be suitable. Check out how to perform the entire process step by step:
1. Preparing the surface for LED profiles
Before installation, make sure that the surface on which you want to mount the LED profile is properly prepared. It should be clean, dry, degreased and smooth. As above, it is best to use isopropyl alcohol or other degreaser to clean the surface to remove dust, grease and other dirt that can reduce the adhesion of the adhesive.
2. Fit and prepare the LED profile
Match the length of the LED profile to the place where it is to be installed. If you need to trim the profile, use a metal saw to get the correct length. After trimming, remove any sharp edges or filings that may impede installation.
3. Apply mounting glue
Choose a suitable mounting adhesive, preferably one that is designed for mounting on various surfaces, such as wood, metal or plastic. Apply a thin, even layer of glue to the back of the LED profile. Avoid excess glue so that it does not flow beyond the edges when you press the profile down.
4. Fixing the LED profile
Apply the LED profile to the prepared surface and press firmly, evenly along the entire length. It is important to hold the profile for a few minutes, especially at the beginning, so that the adhesive can pre-bond. Some adhesives require longer pressure to achieve maximum adhesion.
5. Check alignment
Before the glue sets completely, check that the profile is properly aligned. If you notice any misalignment, now is the moment to correct it. Once the glue has set, it will be difficult or impossible to move the profile.
6. Drying time
Leave the profile in place for the time indicated by the adhesive manufacturer. Typically, full setting of the mounting adhesive occurs after a few hours, but to be safe, it is best to wait 24 hours before fully loading the profile, such as installing LED tape.
7. Installation of LED tape and accessories
After the glue has completely set, you can proceed to install the LED strip in the profile. If the profile has a cover (lampshade), fix it in place. You can also install end caps on the ends of the profile to protect the tape and make the whole thing look aesthetically pleasing.
By following these steps, you will get a solid and durable mounting of the profile with mounting glue, which will allow you to enjoy aesthetically pleasing and functional lighting for a long time.
Why install LEDs with glue?
Mounting LEDs with glue has many advantages that make it a popular installation method. First of all, mounting glue allows you to firmly attach LED strips or profiles to a variety of surfaces, regardless of their texture or material, making it a versatile solution. As a result, it can be used on walls, ceilings, furniture and even in hard-to-reach places where traditional mounting methods, such as screws or brackets, can be problematic.
Mounting glue also eliminates the risk of damaging surfaces, which is especially important for delicate materials such as glass, ceramic tiles or thin furniture boards. It allows for an aesthetically pleasing installation with no visible signs of attachment, which significantly improves the appearance of the final installation. In addition, the adhesive ensures even distribution of forces along the entire length of the LED strip or profile, which increases the stability and durability of the mount.
Another argument in favor of adhesive mounting is the ease and speed of execution. The process is simple and does not require specialized tools or skills, making it accessible to anyone, even those without installation experience. Mounting adhesives bind quickly, which means that LEDs are ready for use almost immediately after installation.
It’s also worth mentioning that mounting LEDs with glue gives some flexibility. If necessary, the profiles or strips can be relatively easily disassembled and fixed elsewhere without much difficulty, which is important if the interior design changes.
Glue mounting is also a quiet installation method that makes no noise and requires no drilling, which can be a big advantage, especially in areas where silence must be maintained, such as offices, schools and apartments in blocks of apartments.
All these factors make mounting glue a practical, convenient and aesthetically pleasing solution for installing LEDs, which provides durable and professional results.
How to install LEDs so they don’t fall off? Summary
To make sure that LED strips will stick solidly to the chosen surface, it is extremely important to prepare the right substrate and choose the right adhesive method. It is worth investing in proven solutions, such as good quality double-sided tapes, mounting adhesives or specialized profiles, which will ensure aesthetic and durable installation. Well-installed LEDs will not only last longer, but also affect the aesthetics of the room and illuminate it in an even and functional way.


