How to make a frame for a mirror? Creative DIY with the use of stucco step by step
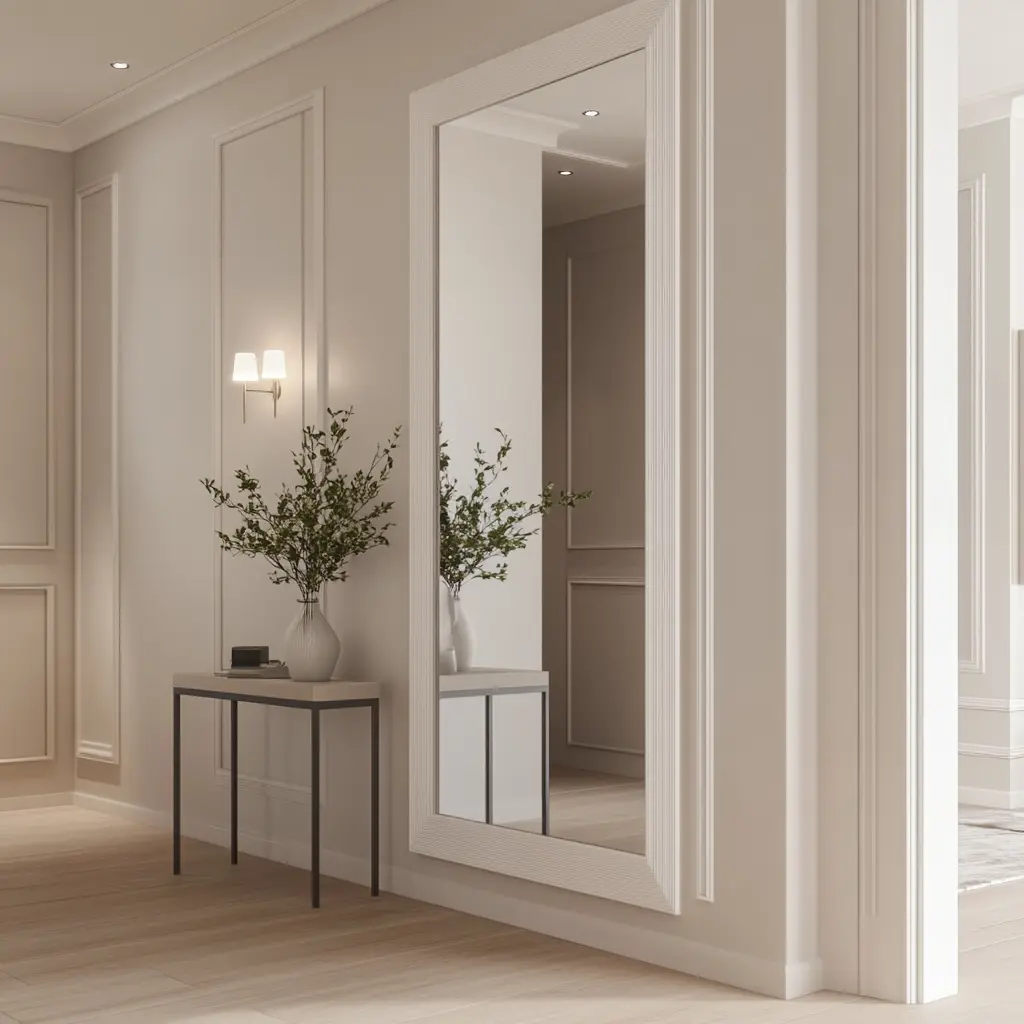
In an era of increasing interest in individualism and uniqueness in interior design, there is a growing fascination with objects that we can make ourselves or that have come out of the hands of another artist, giving our spaces a unique character. Isn’t it intriguing how much warmth and personal touch can be introduced into an interior by a mirror frame made by ourselves, using simple materials such as profiles, sandpaper or plywood? Creating such items as mirror frames with our own hands not only allows us to tailor them to our interior and taste, but also becomes an opportunity to express ourselves through applied art.
What will you learn from this article?
Why are DIY mirrors gaining popularity?
DIY mirrors are gaining popularity because they reflect not only individual style, but also the spirit of creativity and self-reliance that we now value so much in interior design. Is there anything more satisfying than creating a mirror frame that perfectly harmonizes with the unique character of our interior? Thanks to the use of such materials as polystyrene profiles, mounting glue or a classic handsaw, the process becomes accessible even to those without experience.
DIY mirrors allow you to fine-tune the dimensions and style, from a white Scandinavian-style frame to more ornate forms that effectively encase the sheet of glass, giving it a unique character. If you are dreaming of such a mirror, but don’t know how to go about it, in our guide you will find all the necessary tips to make your own mirror frame step by step.
Self-made mirror frame – what will you need?
Self-made mirror frame is not only a practical solution, but also a unique opportunity to give the interior a unique character according to your taste. In order to make this project a success, it is worth getting the right materials and tools that will allow you to make each piece with precision.
To make a mirror frame yourself, you will need the following components:
- boards or profiles – an indispensable component for creating a solid frame (boards or profiles can be wooden or made of other durable materials),
- paint – allows you to finishes the frame in any color, matching the style of the interior,
- mounting glue – indispensable for permanently joining the elements of the frame with the mirror,
- classic handsaw – helpful for precise cutting of profiles and boards to the required size,
- sandpaper – ideal for smoothing the edges of the frame before painting,
- fiberboard – reach for it when you need to create a substrate for the mirror, which will at the same time connect to the mirror frame and stabilize the entire new structure,
- miter box – essential for precise trimming of profiles at the right angle.
Creating your own mirror frame is a process that engages creativity and allows you to fully customize the design to suit your individual needs and interior style. With proper preparation and the use of carefully selected materials, you are sure to create something that will delight everyone who crosses the threshold of your home. Let your mirror become not only a functional element, but also an expression of your artistic vision.
How to make a mirror frame yourself? Step-by-step guide
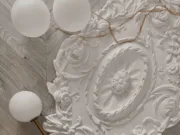
To make a mirror frame yourself, using decorative profiles from Mardom Decor, you need: precision, imagination and basic tools. Choosing the right skirting boards, wall mouldings or ceiling mouldings will allow you to create a frame tailored to your interior style, emphasizing its elegance.
When making a mirror frame yourself, consider such steps as:
1. Choosing the right decorative profiles
To start, choose profiles that best suit your style and mirror dimensions. Mardom Decor ceiling mouldings will work well in classic designs, while skirting boards or wall mouldings in a modern style will add a minimalist touch. By choosing profiles made of materials such as PolyForce or ProFoam, you gain durability and resistance to damage.
2. Preparing tools and accessories
Before you start, make sure you have everything you need: sandpaper for smoothing edges, a classic handsaw and miter box for precision cutting, installation glue, paint in your preferred color, and useful accessories such as fiberboard as a backing.
3. Trim profiles to the right dimensions
Using a handsaw and a miter box, trim the profiles at a 45-degree angle to get perfect joints at the corners of the frame. This will give you precise joints for a harmonious look.
4. Joining the pieces
A mounting adhesive, such as Mardom Decor Fix Pro, will allow you to accurately and permanently join the profiles. Use it on the ends of the profiles, pressing the pieces together to create a stable frame structure. Remember to remove excess glue immediately with a damp cloth.
5. Finishes and painting
After the glue has dried, gently sand the edges with sandpaper to get rid of any unevenness. Then paint the frame with paint in the color of your choice – white, black or pastels will suit both modern and classic arrangements.
6. Installation of the mirror
Place the mirror in the frame, using the fiberboard as a back support. Mounting glue will also work great for fixing the mirror in the frame.
Making your own mirror frame not only gives you satisfaction, but also allows you to match the decorative elements perfectly with the style of your interior. You can find inspiration and products that will make your project unique in the Mardom Decor catalog. Isn’t it worth trying to create something that will highlight your creativity and personal style at the same time?

Mardom Decor products to include in this arrangement:
- Skirting boards: skirting board MD235, skirting board QL021, skirting board MD032, skirting board MD094, skirting board MD355.
- Wall mouldings: wall moulding MD010, wall moulding MD012, wall moulding MD413, wall moulding MD255, wall moulding MD325.
- Cornice mouldings: MDB180 ceiling moulding, MDB135 ceiling moulding, MDB063 ceiling moulding, MDB174 ceiling moulding, MD118 ceiling moulding.
What mistakes to avoid when creating a mirror frame yourself?
Creating a mirror frame on your own is not only a way to express your creativity, but also a challenge that requires precision and planning. To achieve a perfect result, it is worth knowing what mistakes to avoid to avoid frustration and the need to correct imperfections. Thoughtful selection of materials and tools, as well as proper surface preparation are the keys to success in the step-by-step process of creating a mirror frame.
What should we avoid when creating a mirror frame ourselves?
- Lack of precise dimensions of the profiles – improper adjustment of the length of the profiles can result in visible gaps or uneven edges, which will negatively affect the aesthetics of the frame.
- Ignoring the need to smooth the edges with sandpaper – inaccurately sanded profiles can appear unfinished and uneven, which will affect the quality of the frame.
- Improper use of a miter box – cutting the profiles at the wrong angle will prevent them from connecting properly, leading to an unsightly appearance of the frame corners.
- Using the wrong mounting glue – the use of low-quality glue or glue unsuitable for the materials will result in poor adhesion of the elements and lack of durability of the frame.
- Skipping the painting stage or choosing the wrong paint – failure to paint or using paint that is not resistant to mechanical damage can reduce the durability and aesthetics of the finished frame.
- Using inappropriate materials, such as thin plywood or fiberboard – failure to match the thickness of the backing to the weight of the mirror can lead to structural instability and loss of safety of use.
Each stage of creating a mirror frame requires care and awareness of how indispensable it is to avoid basic mistakes. Precision, the right tools, as well as knowledge of the best materials, such as profiles and mounting adhesives from Mardom Decor, will make making the frame yourself not only possible, but also enjoyable and satisfying.
How to make a DIY mirror frame using stucco? Summary
DIY (do it yourself) mirrors are winning the hearts of lovers of interior experiments, because they allow you not only to create an object that perfectly fits the space, but also to bring a bit of your own character to the interior. Is there anything more satisfying than the daily use of a mirror whose frame you created with your own hands? By using stucco from Mardom Decor, you can not only achieve an amazing visual effect, but also guarantee durability and ease of installation thanks to modern technologies such as PolyForce and ScratchShield.
The process of making a mirror frame allows you to experiment with shapes, finishes and colors – from white classics to intense shades painted with your own hands. The right choice of components, such as cornice mouldings, skirting boards or ceiling profiles, and precision tools such as a miter box and sandpaper, ensures ideal results. Mardom Decor offers support in the form of products that are easy to install and extremely durable, so that anyone, even a novice DIYer, can create something unique. If you dream of a frame that will become a unique accent in your interior, this DIY adventure is for you.
Read also